We all know how to make bootable USB drive using software,but we can also make bootable USB without using any software and install operating system in our machine.
Now-a-days only few people burn iso images on disks and use them as bootablei media.But now most of the people are using USB drives as they are faster not only faster they are more effecient and convenient to install operating system on a machine.Just follow the below steps to create bootable USB drive without using any software.
create bootable USB without using any software:-
step 1
firstly insert USB drive in your device.
step 2
open the command prompt to open command prompt , press Windows + r and type cmd then press enter.
step 3
Now in command prompt type diskpart and press enter,it will ask for the administrator permissions click on yes and wait for while after that a new command prompt will appear.
step 4
Now in command prompt type diskpart and press enter,it will ask for the administrator permissions click on yes and wait for while after that a new command prompt will appear.
step 4
In new diskpart command prompt type list disk and press enter.It will show you all the disks in your computer.
step 5
You will see two disk types
Disk 0 for hard drive.
Disk 1 for USB flash drive.
step 6
Here we need to create a bootable usb drive so type select disk 1 in the same command prompt and press enter then it will select USB drive and displays Disk 1 is now the selected disk.
step 7
Now type clean and press enter this will clean your USB drive and displays succeeded in cleaning the disk.
step 8
Now type create partition primary and press enter .It displays a Diskpart succeeded in creating the specified partition.Then type select partition 1 and press enter,it will choose partition 1.
step 9
Type active and press enter,then it will active the partition.
step 10
Now type format fs=ntfs quick and press enter to format your partition and then type exit and press enter.
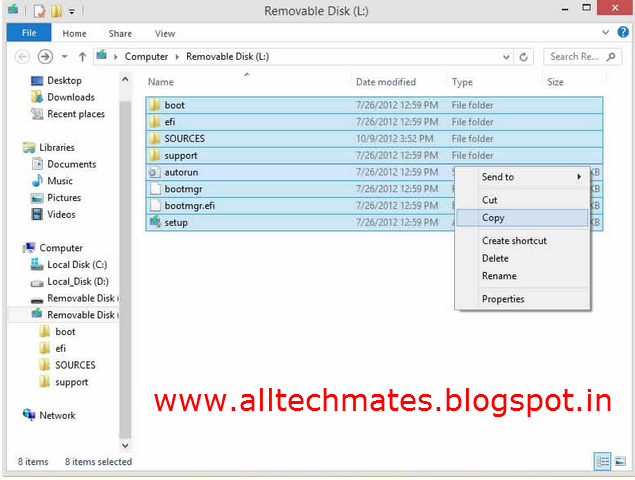
How To Copy Files From An ISO Image to USB manually:
Now open the files inside the ISO file,gently copy those files and paste them gently in the USB drive,this will make your USB drive bootable.


.png)


.png)


